When annotating images, you add descriptive labels to them to help
your readers understand what they represent. It is easy to do this in
Microsoft Word by using callouts. A callout consists of a shape for your
text (like a rectangle) and a line that connects the shape to the
image.
Let’s annotate an image now, as an example.
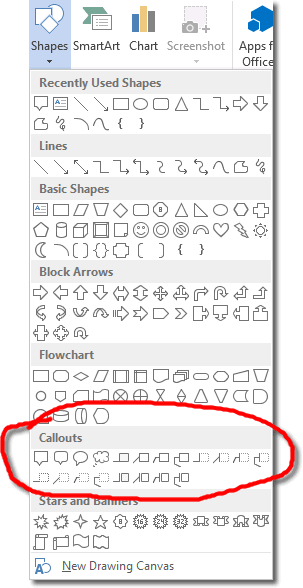
First of all insert an image into your document: go to the insert tab and click Pictures, in the Illustrations group. Navigate to your image, select it and click insert. Now for the callout: remaining in the Illustrations group, click Shapes.
Read More

Select one of the callout shapes and you’ll see the cursor change to a big “+” symbol. Click on your image and drag out the callout. When you start typing, the text will appear within the callout.
You can resize the callout box using the drag handles, but more importantly, you can change the position of the line connecting the text to the image. I say “line” here, but it could be any shape that connects in this way.
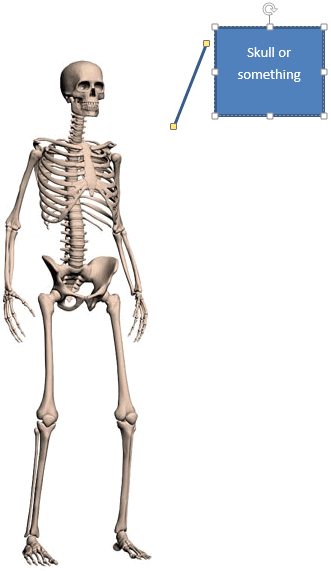
Below is an example image and callout:

The callout is in its default shape before we make any changes to it. The line looks a little disconnected, but we can move one end closer to the text box so that it looks like it’s attached to it. Just click and drag the yellow drag handle.
Also, whole callout could be closer to the image, so hover over the callout until the cursor changes to a crosshairs shape and then click and drag the callout. The callout box looks a little big for the small amount of text it contains, so let’s resize the box and make it smaller. Drag either the handles on the sides or those on the corners of the box. Beware: resizing the text box actually resizes the connector line too so you may have to reposition it.
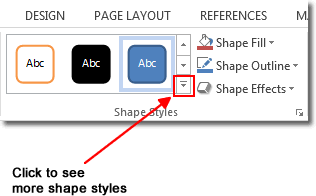
Finally, you might like to remove the colour fill from the callout. Perhaps a white background and black border is preferred? You can use one of the preset Shape Styles (fortunately the first one gives a white background and black border) or adjust the fill colour and border colour manually. For fill colour use he Shape Fill command in the Shape Styles group, and for border colour, use the Shape Outline command.

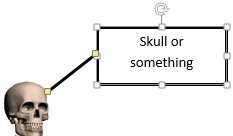
In the end, we got something like this:

Much better!
Let’s annotate an image now, as an example.
First of all insert an image into your document: go to the insert tab and click Pictures, in the Illustrations group. Navigate to your image, select it and click insert. Now for the callout: remaining in the Illustrations group, click Shapes.
Read More
Select one of the callout shapes and you’ll see the cursor change to a big “+” symbol. Click on your image and drag out the callout. When you start typing, the text will appear within the callout.
You can resize the callout box using the drag handles, but more importantly, you can change the position of the line connecting the text to the image. I say “line” here, but it could be any shape that connects in this way.
Below is an example image and callout:
The callout is in its default shape before we make any changes to it. The line looks a little disconnected, but we can move one end closer to the text box so that it looks like it’s attached to it. Just click and drag the yellow drag handle.
Also, whole callout could be closer to the image, so hover over the callout until the cursor changes to a crosshairs shape and then click and drag the callout. The callout box looks a little big for the small amount of text it contains, so let’s resize the box and make it smaller. Drag either the handles on the sides or those on the corners of the box. Beware: resizing the text box actually resizes the connector line too so you may have to reposition it.
Finally, you might like to remove the colour fill from the callout. Perhaps a white background and black border is preferred? You can use one of the preset Shape Styles (fortunately the first one gives a white background and black border) or adjust the fill colour and border colour manually. For fill colour use he Shape Fill command in the Shape Styles group, and for border colour, use the Shape Outline command.
In the end, we got something like this:
Much better!

No comments:
Post a Comment